
Why choose this template for my ePortfolio?
This site is using WordPress’ free Fukasawa theme, which organizes posts into a compelling gallery format (automatically!) This theme relies on creating posts, which means that the most recently added items will show up at the top of the homepage, unless you make them sticky. You can still have static pages (see About Me), but they won’t be posted on the homepage.
How to customize this template
Start by customizing your site title by selecting the “customize” button when you have logged in.

The customizer will open on the left of the page. Select “Site Identity” to give this template a new title and tagline that suits you and your needs.

Whatever changes you make, don’t forget to click the blue “Publish” button at the top to save.
Different types of posts
This theme has four different post formats to choose from. The biggest difference between them is how they are presented on the homepage.
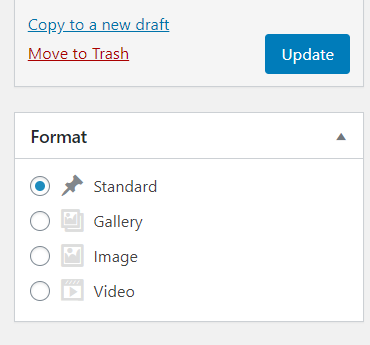
Standard
This option is generally for text content. If you add a featured image, then the image will be added to the top of the post and be featured on the homepage. This post is an example of Standard with a featured image. Technical Instructions is an example of a text only Standard post.
Want to control how much of your post’s text is revealed on the homepage? Insert the “More” block (in Block editor) or the “Insert Read More Tag” (in Classic editor) where desired.
Gallery
This option is great if you have a couple images to share. It will generate a slide show of your images at the top of the post and on the homepage. All you need to do is add the images to the post and make sure the gallery option is selected. Artifacts is an example of a Gallery post.
Image
This option is very similar to a Standard post with featured image, except that none of the text from the post will display on the homepage. Organization is an example of a Image post.
Video
This option is very similar to a Standard post. Only the text will display on the homepage unless you add a featured image. To add a video, you will first need to add it to the media gallery by upload or by URL.
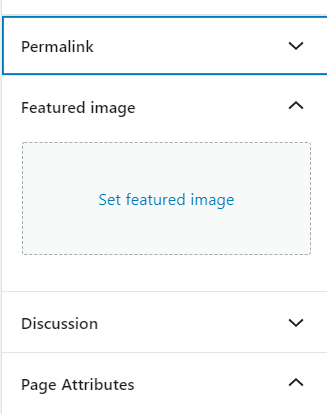
Adding a feature image
When editing a page, ensure “Document” is highlighted in the right hand menu. Click on “feature image” and click on “set feature image” to upload or select an image. Don’t forget to click “Update” to save your changes!
Categorizing your posts
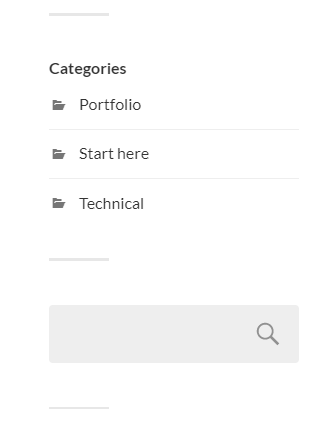
Creating categories is a great way to organize and group your posts. In this template, the side bar will list your categories and when you click on the folder, the homepage will only display the posts in that category.
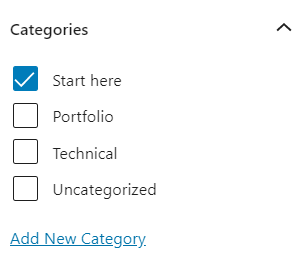
To select or create a new category, go to the document editor on the right and scroll down to the Categories section. After you have made your edits, click the blue “Update” button.
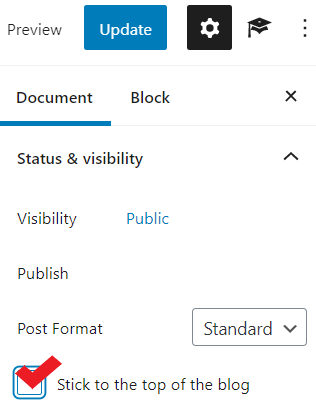
How to make posts sticky
Making a post sticky means that it will stay at the top of your page (E.g. this post and What is an ePortfolio? are sticky). To do this, start by editing this post, then make sure to select the “Document” editor on the right. Check the box that says “Stick to the top of the blog.” Don’t forget to click the blue “Update” button to save.
Turning comments on
If you would like to allow viewers to make comments on any of your posts, in your dashboard, go to “Posts.” Select the post(s) that you would like comments on and click “Quick Edit.” In Quick Edit, check the box that says “Allow Comments.” Lastly, click the blue “Update” button to save your changes.
